Ուղեցույց մասնագետի համար
Ուղեցույցը հասանելի է անգլերեն և ռուսերեն։ Ստորև՝ անգլերեն տարբերակը։
1. Before you start
- Device: a computer, laptop or tablet with a camera, and an up-to-date Chrome or Edge browser. An internet connection is needed: results are calculated on the server.
- Camera: the built-in camera works; a USB webcam or a tablet on a tripod is more convenient. Fix the camera — do not hold it in your hand.
- Room: good, even light from the front, a plain background, 2.5–3 m of free space in front of the camera.
- Patient: fitted clothing so that the joints are visible (shorts for hip, knee and ankle tests); bare forearm and hand for hand tests.
- A chair with a back, for tests done while holding on or sitting.
2. Open the program
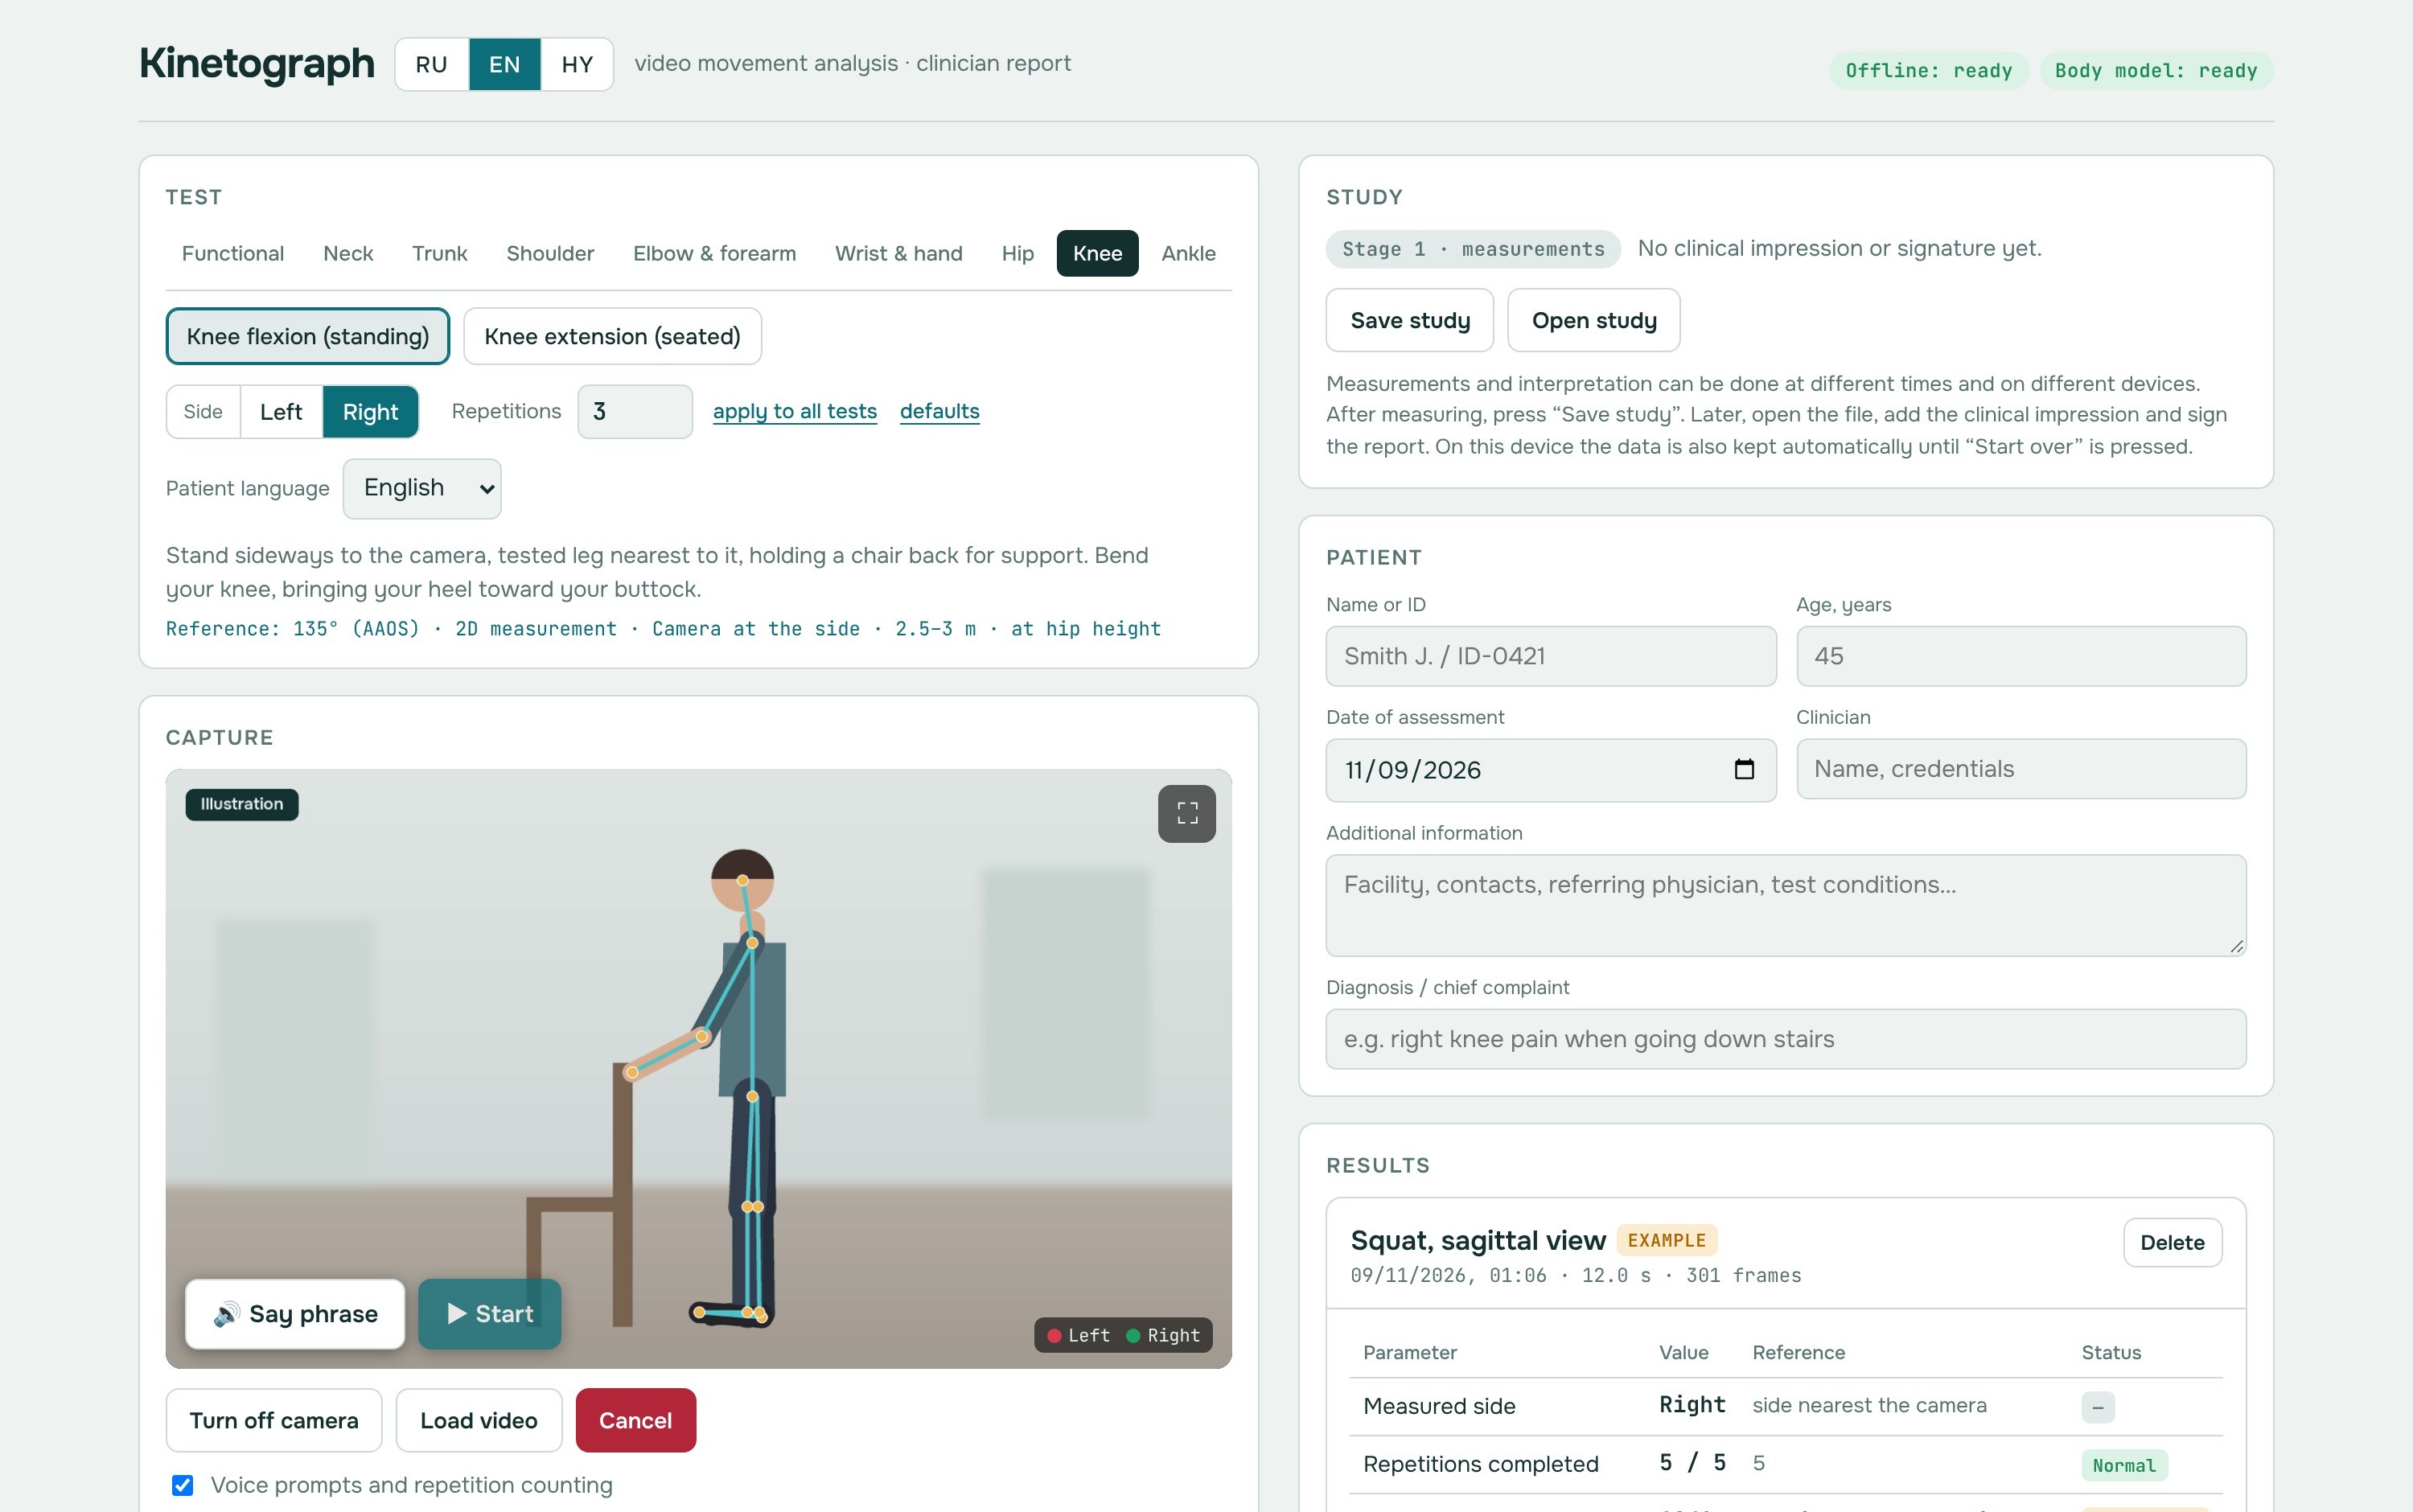
Sign in and press Open Kinetograph. The first opening loads the body model (about 10 MB) — wait until the label in the top right says Body model: ready. Allow the browser to use the camera when asked.
The interface language is switched with RU | EN | HY next to the program name. It does not change the language of patient instructions or reports.
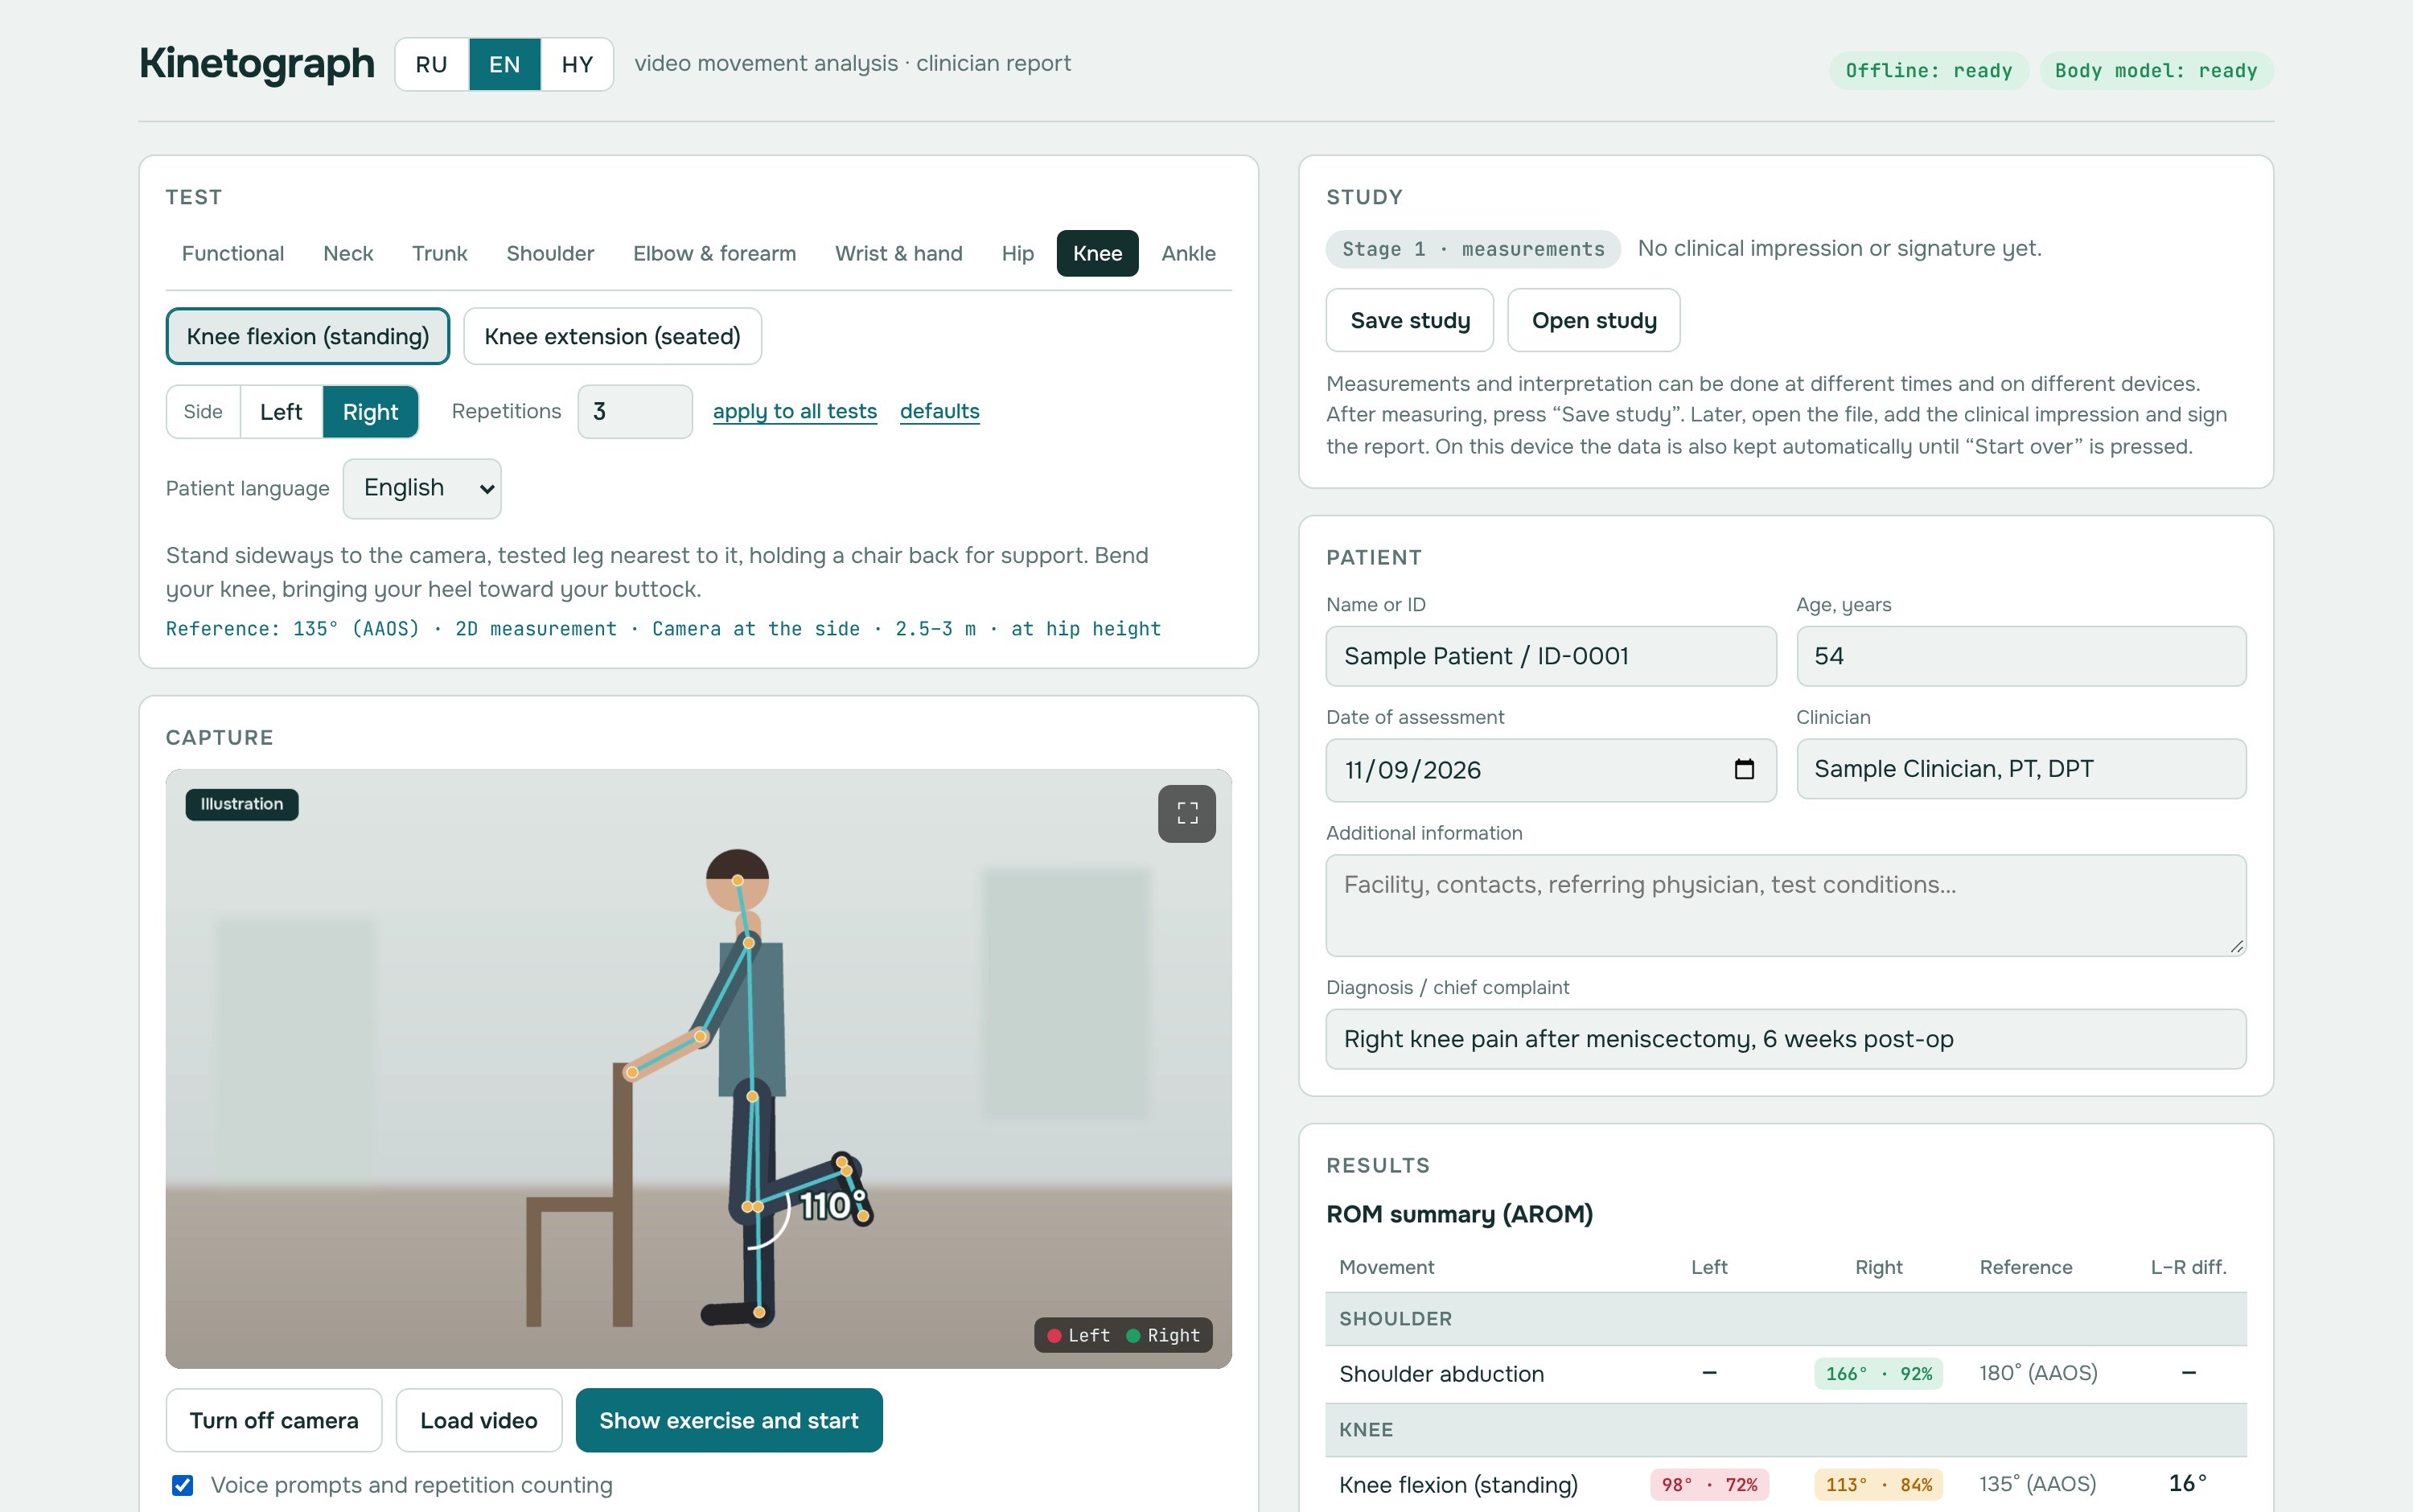
3. Patient data
Fill in Name or ID, Age, Date of assessment, Clinician and Diagnosis / chief complaint. Age is used for age-dependent norms (for example, single-leg stance). Additional information can hold the facility, referring physician or test conditions; it appears in the report.
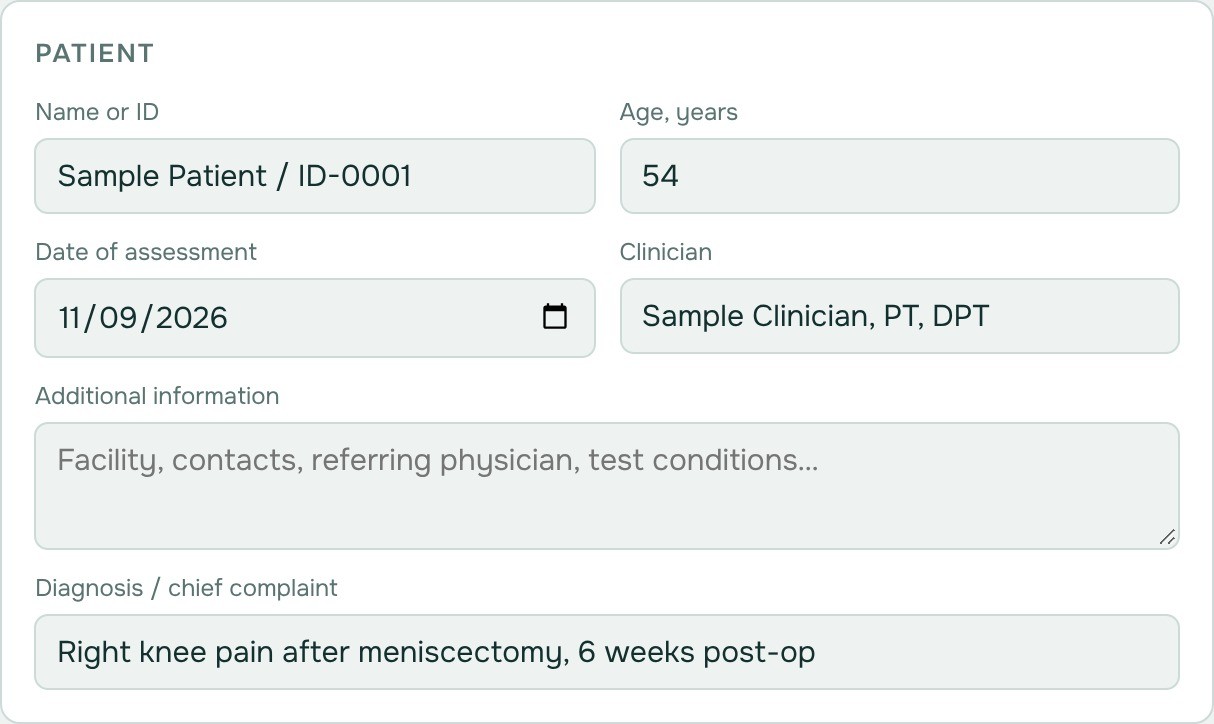
4. Choose a test
- Choose the region: Functional, Neck, Trunk, Shoulder, Elbow & forearm, Wrist & hand, Hip, Knee, Ankle.
- Choose the test. The line under the buttons shows the starting position, the reference value and where to place the camera.
- For one-sided tests choose the side (Left / Right).
- Set the number of repetitions (2 or more). Apply to all tests uses this number everywhere; defaults restores the standard values.
- Choose the patient language for spoken instructions: English, Russian, Spanish, Chinese or Hindi.
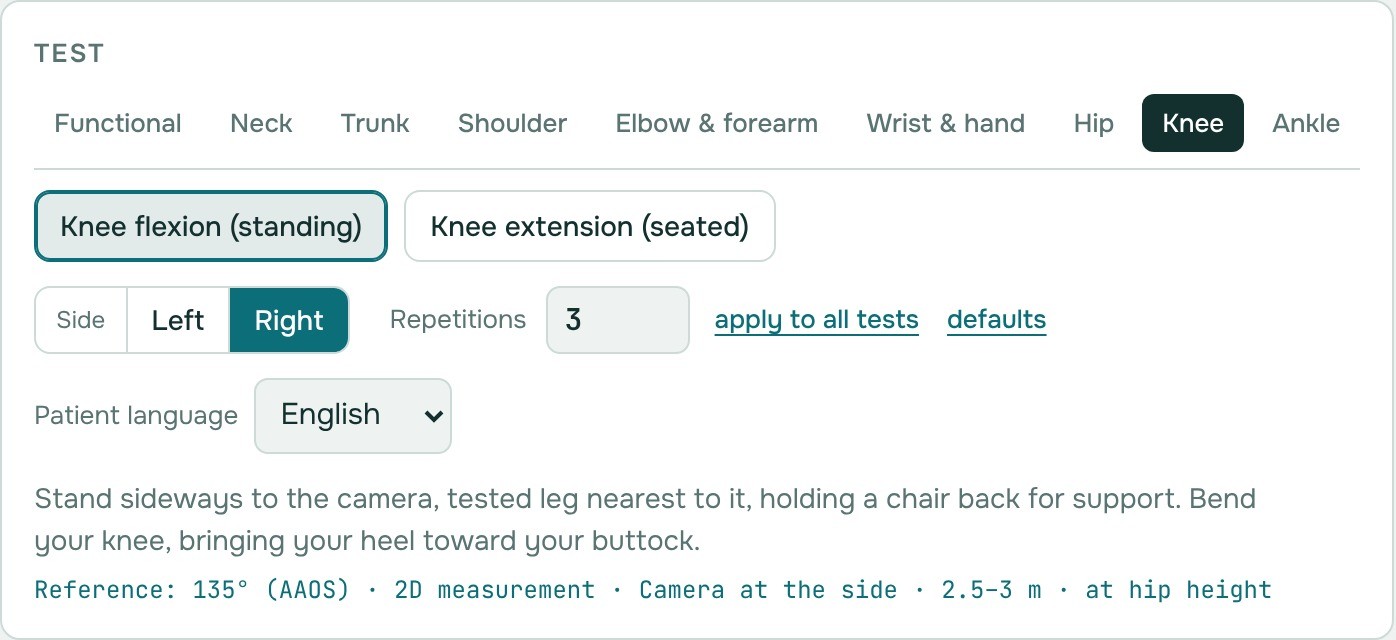
5. Place the camera
- Side view (flexion/extension of the neck, trunk, shoulder, hip, knee, ankle): camera at the side, 2.5–3 m away, at hip height; the tested side nearest the camera.
- Front view (abduction, lateral flexion, rotation, squat from the front): camera in front, 2.5–3 m, at hip height.
- Upper body (neck): camera at head height, 1–1.5 m.
- Hand and fingers: camera close to the hand, 40–60 cm.
Press Turn on camera (or Load video to analyse a recorded file). The whole body must be visible from head to feet, except in hand tests.
6. Demonstration
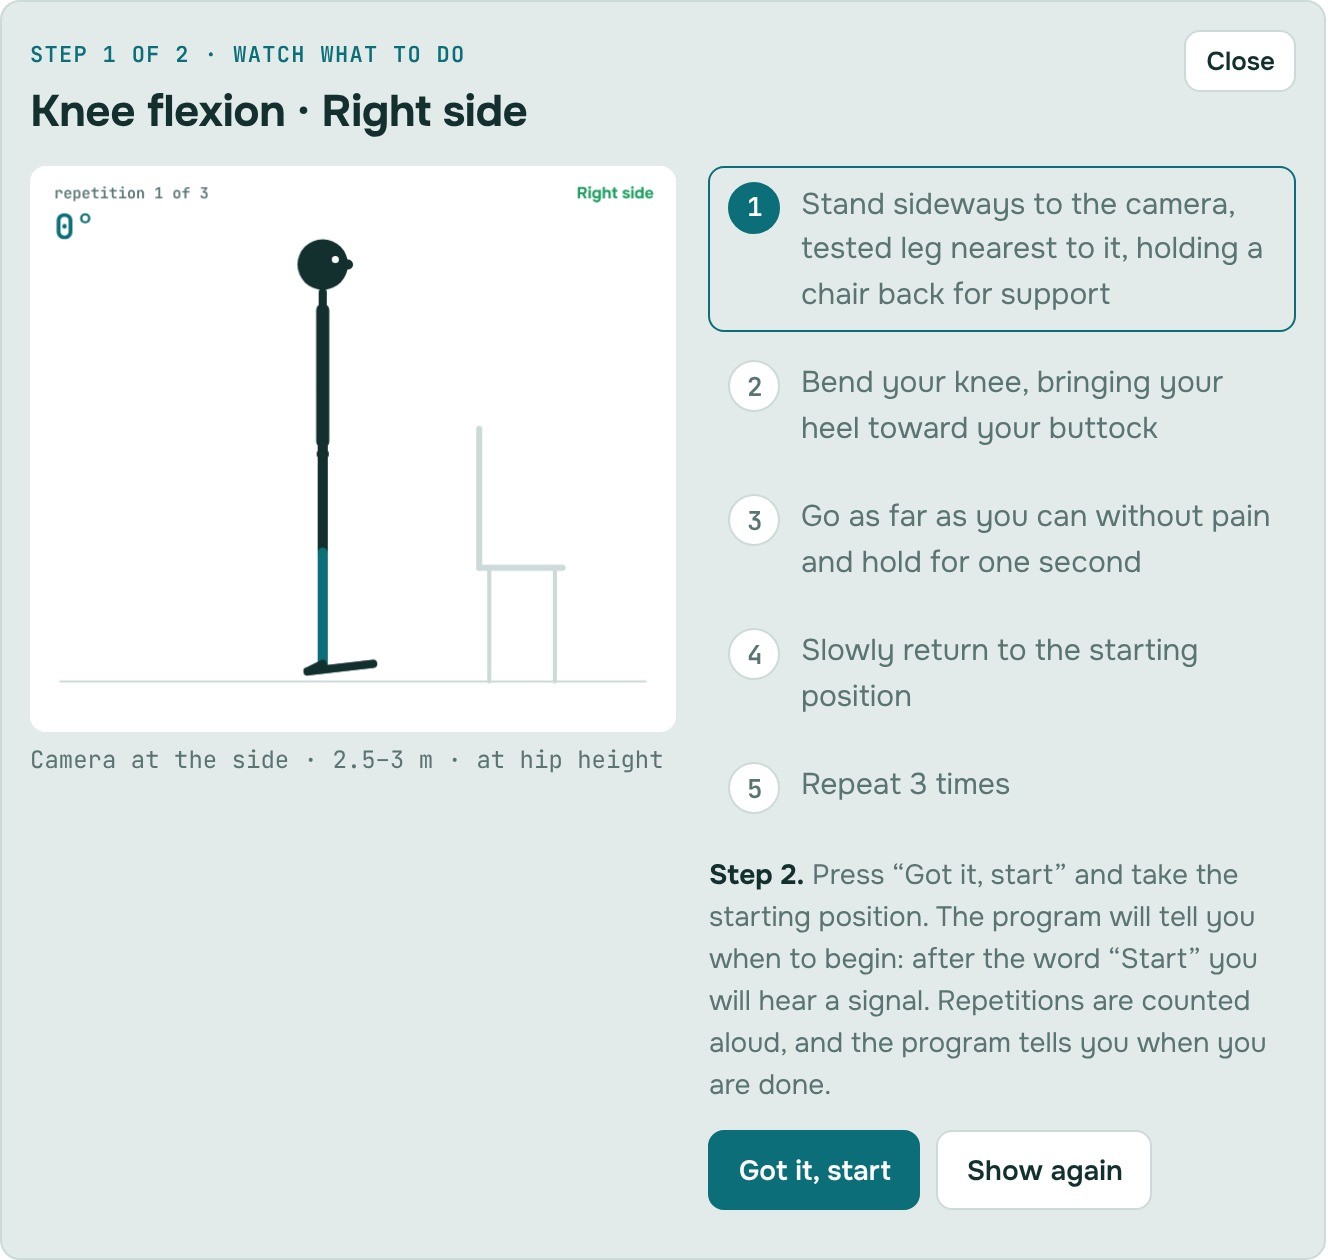
Press Show exercise and start. An animated figure shows the movement step by step while the program explains it aloud in the patient’s language. The patient only watches. Use Show again if needed, then Got it, start.
7. Start and record
- The patient steps back and takes the starting position. The screen tells them if their head or feet are out of the frame.
- Press 🔊 Say phrase: the program says “Start this exercise when you hear the signal”. Press it again as many times as needed if the patient did not understand.
- When the patient is ready, press ▶ Start: the program says “Start” and a beep follows immediately.
- Repetitions are counted aloud. Angles are measured live. When the set number is reached, the program says so and finishes the test after a short pause. Finish ends a test early; Cancel discards it.
8. Delete a wrong attempt
If the patient moves the wrong way — the opposite direction, a rotation instead of a bend, a compensation — press ↶ Delete last attempt right away, before the patient continues. The program removes the last uncounted movement or the last counted repetition, asks the patient to repeat it, and the report shows how many attempts were excluded.
Only movement toward the tested side is counted: a movement to the other side never counts and does not change the maximum.
9. Results and norms
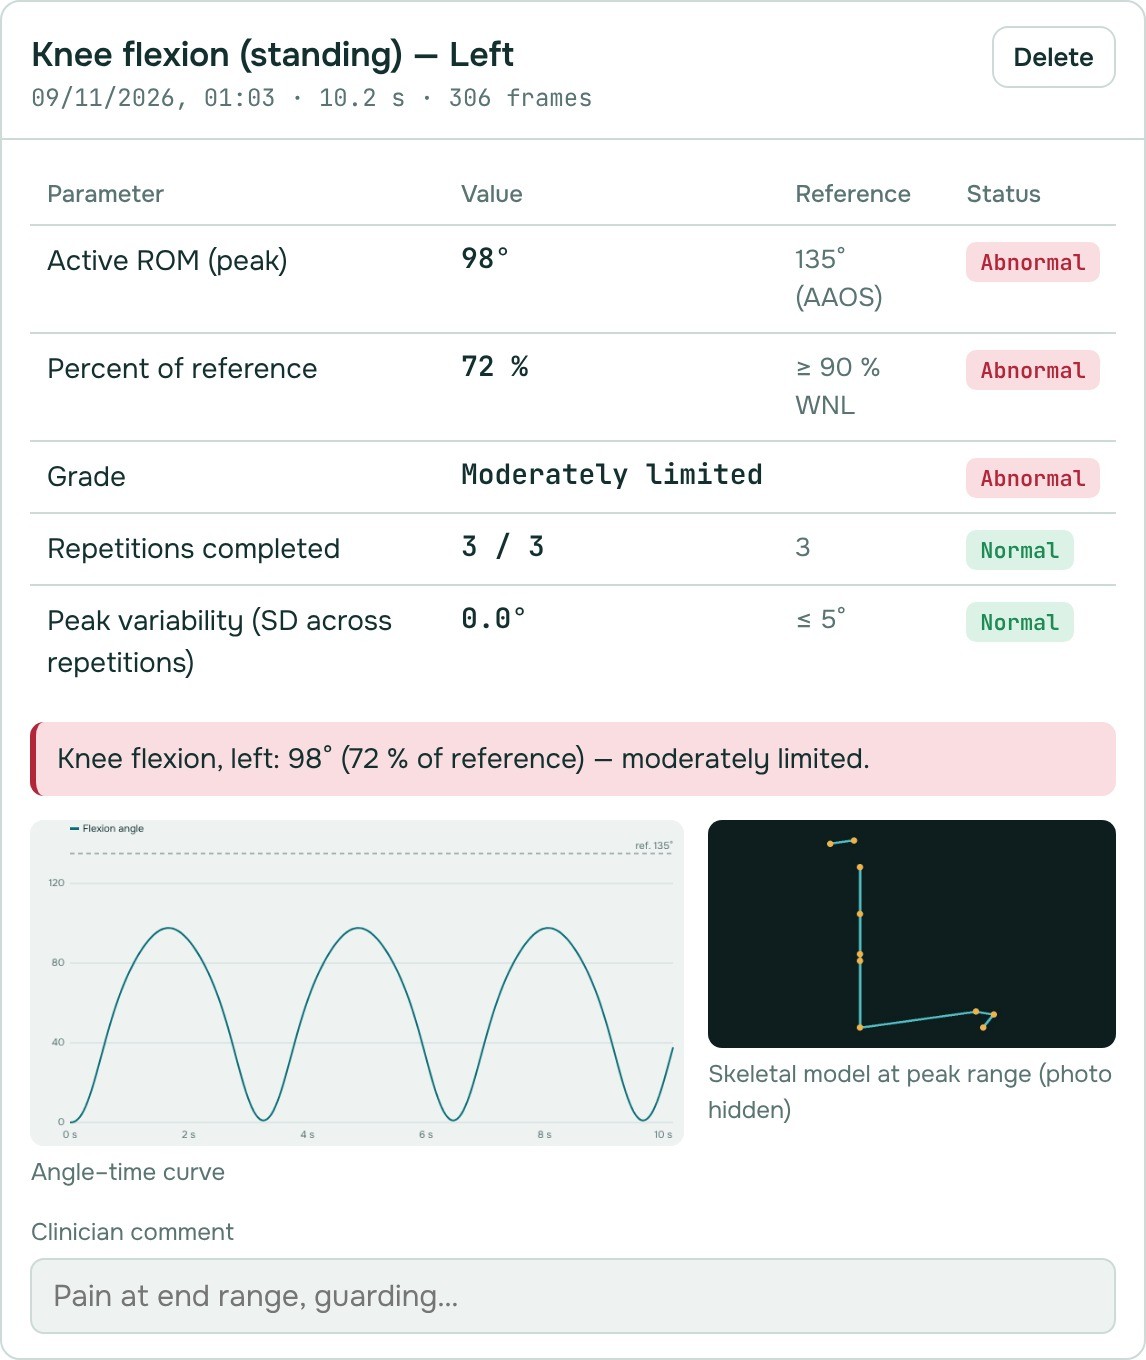
After each test a result card appears: peak active range of motion, percent of the reference value (AAOS, AMA Guides, ASSH, Springer et al.), a grade — within normal limits, mildly, moderately or severely limited — repetitions, variability, compensations, the angle–time curve and the frame at peak range. Findings are listed in clinical English. The ROM summary table compares left and right sides.
Add a clinician comment to any test. Delete removes a test result.
10. Patient photo on/off
Tick Hide the patient photo in the report to show only the skeletal model at peak range. Untick it to include the camera frame. You can change this at any time before downloading the report.

11. Clinical impression, signature and report
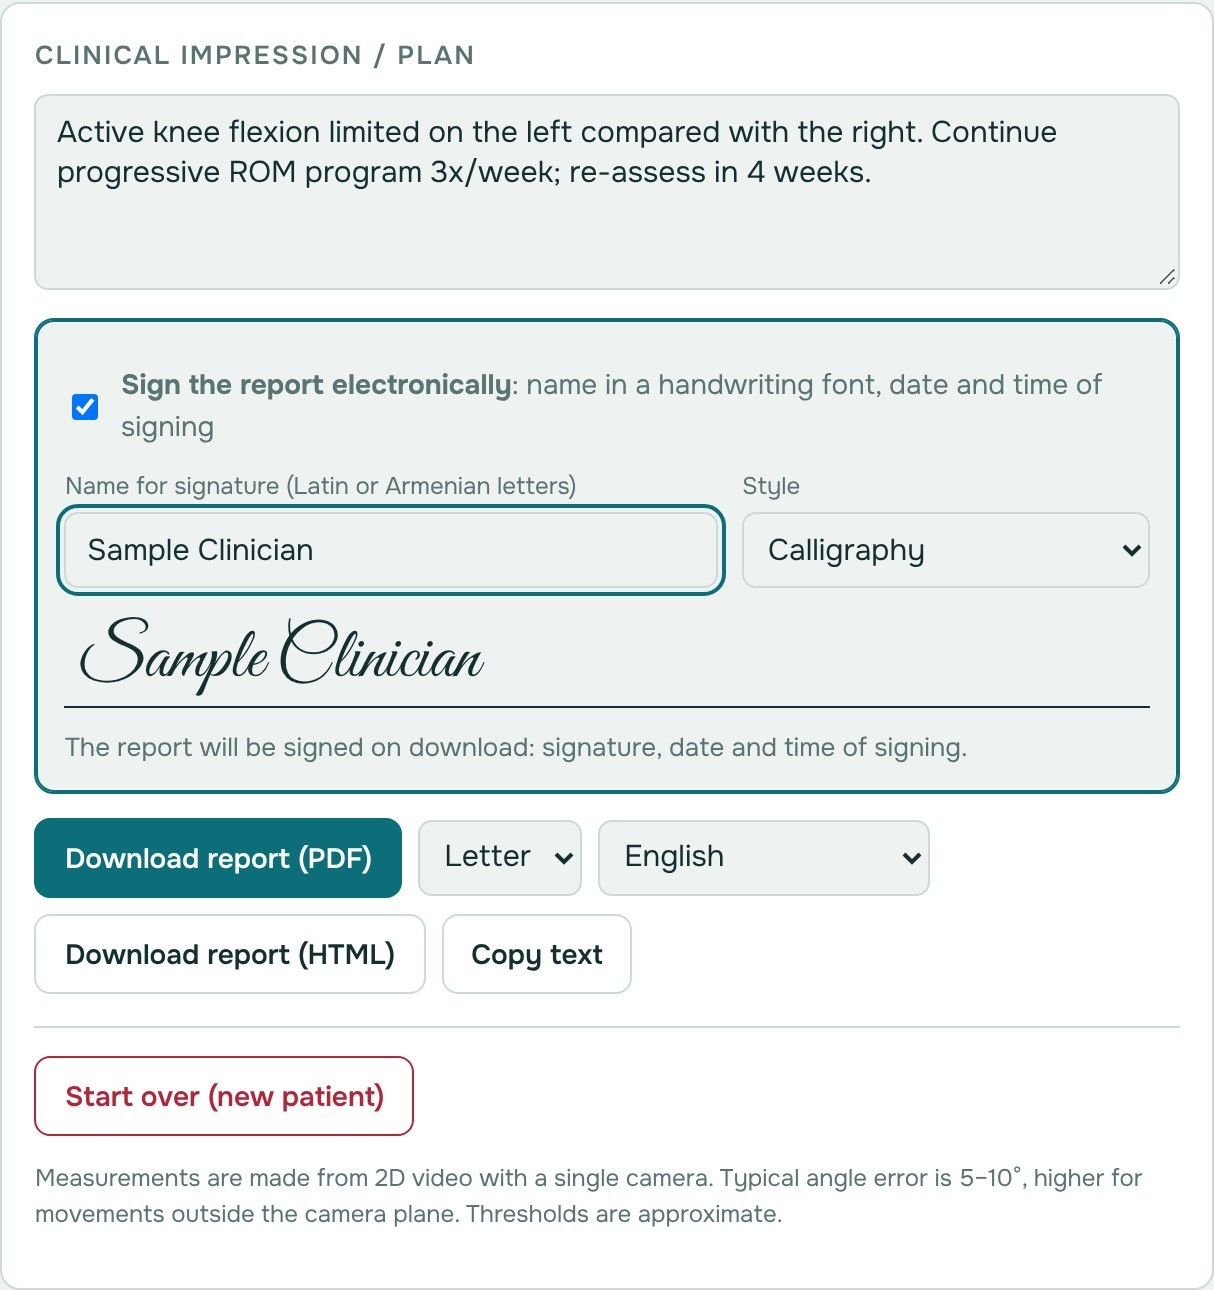
- Write the Clinical impression / plan.
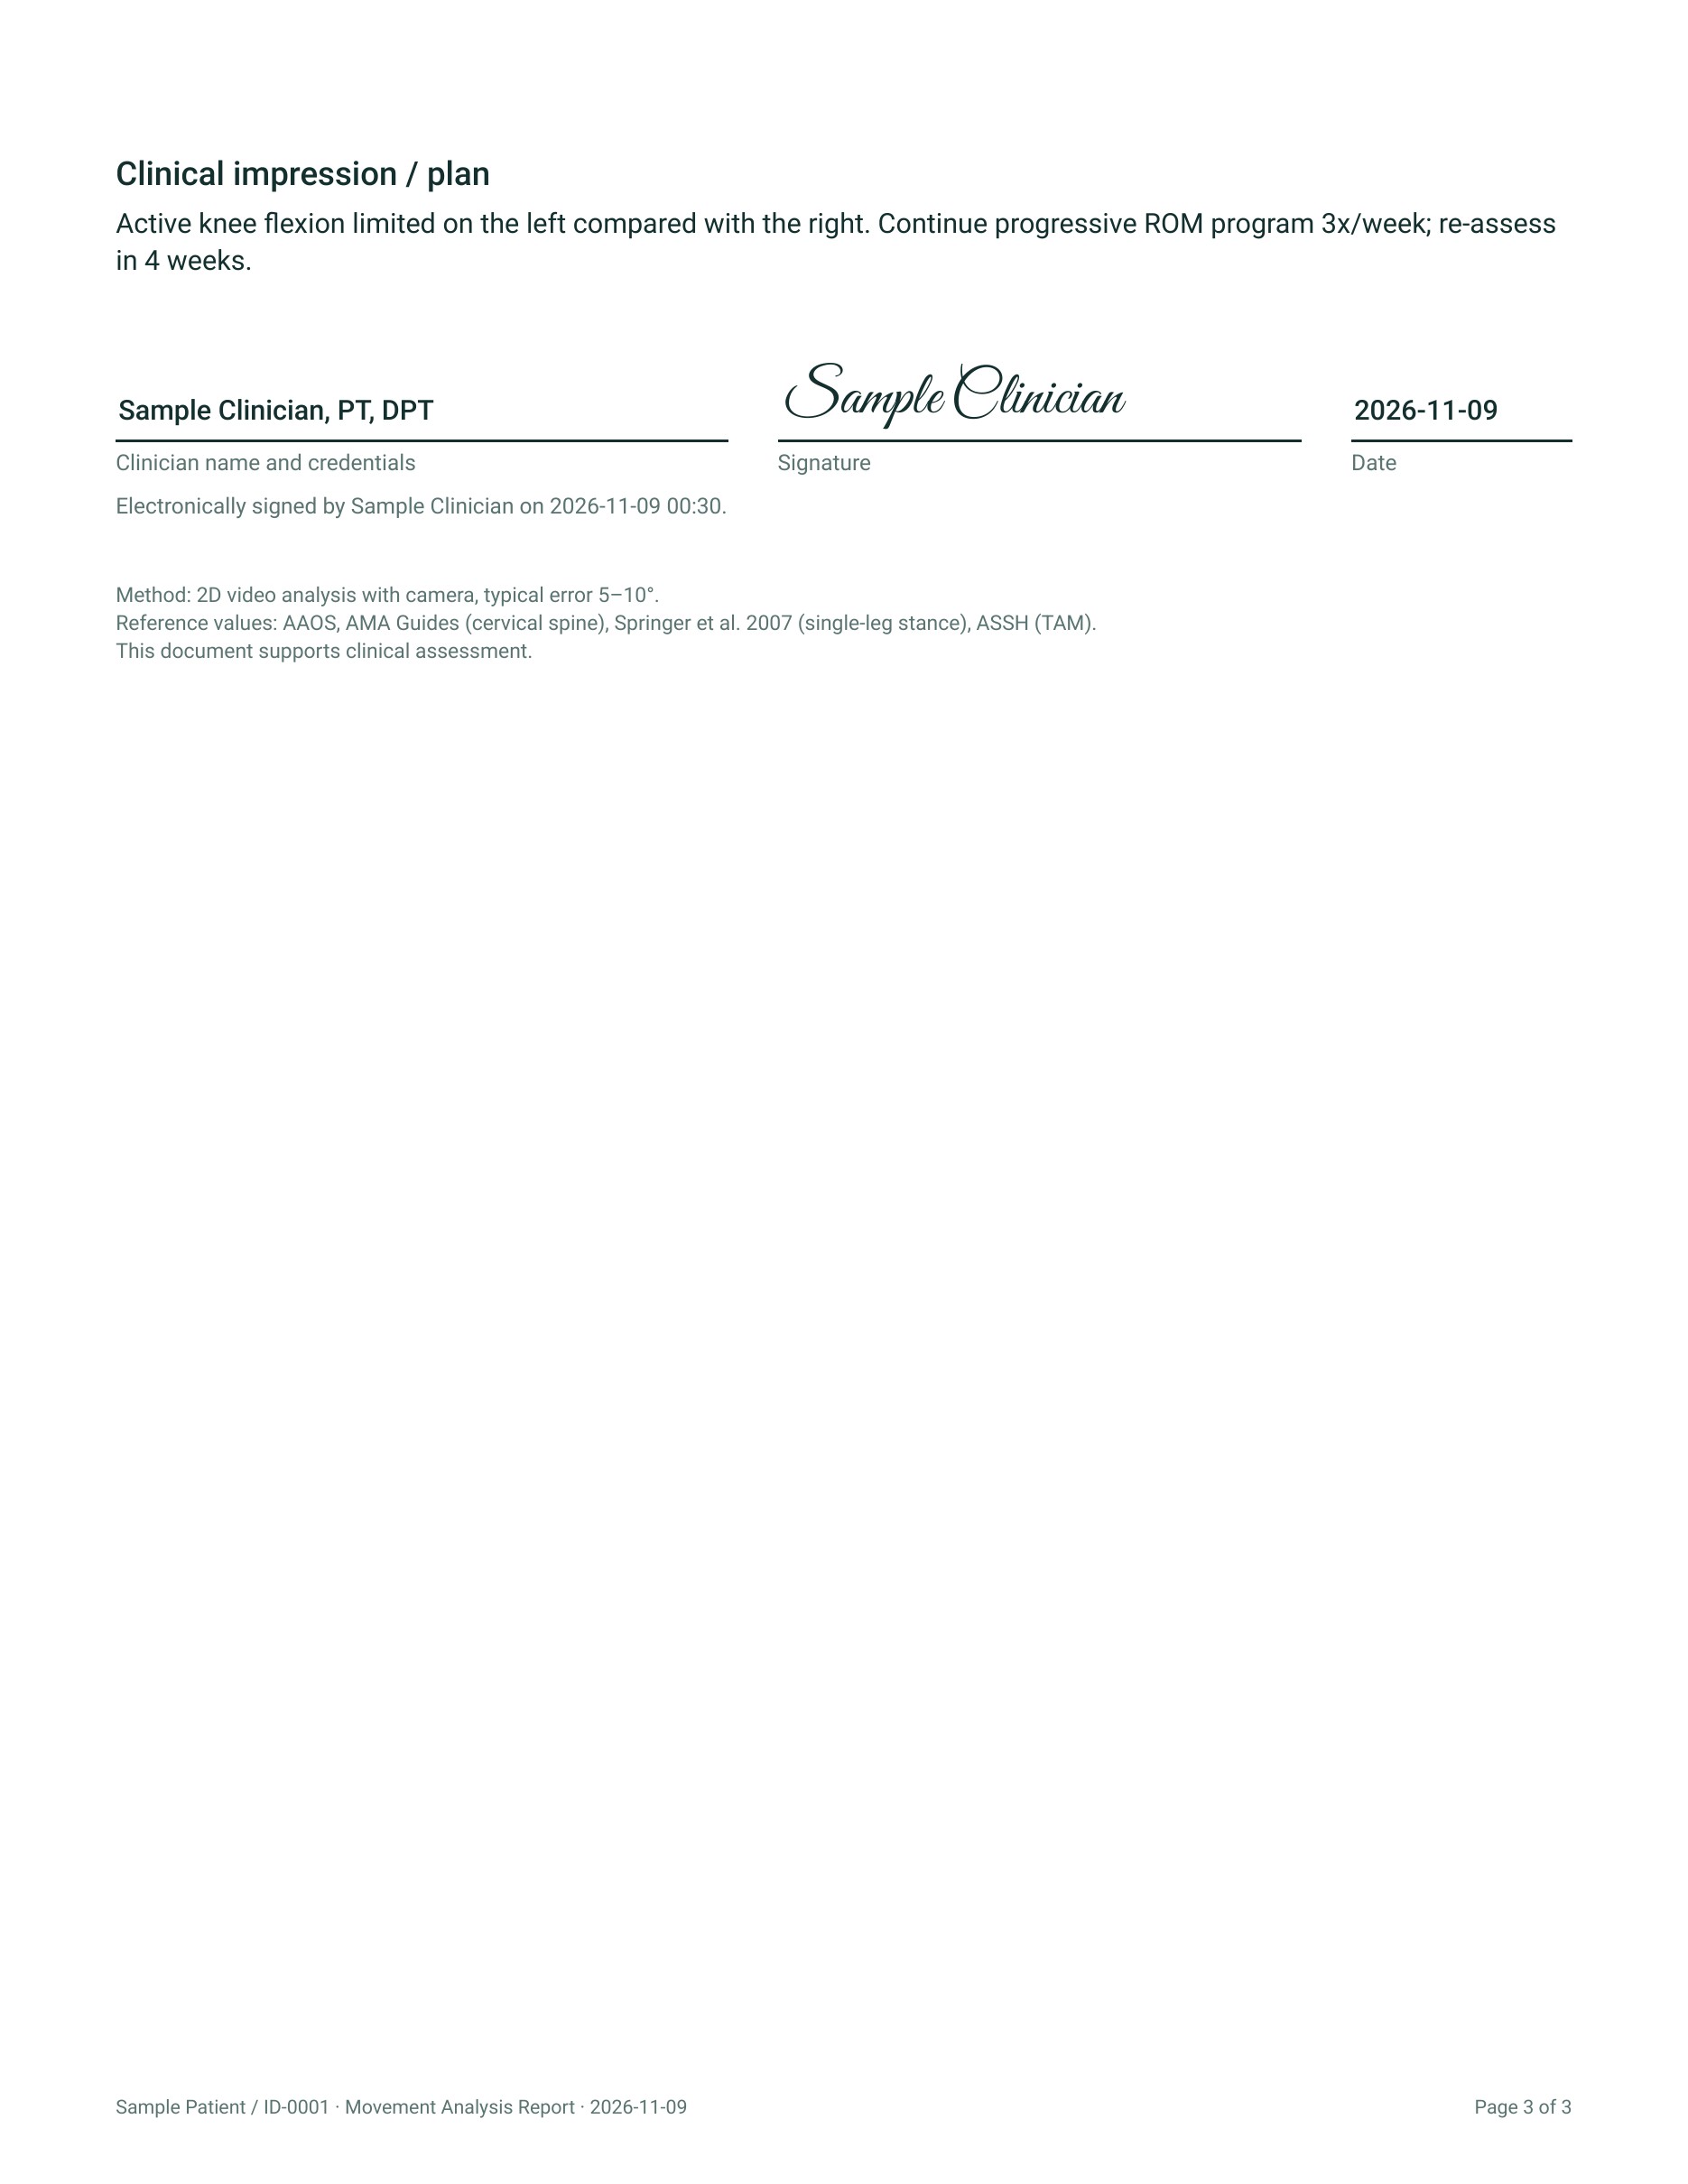
- To sign electronically, tick Sign the report electronically, type your name (Latin or Armenian letters) and choose a handwriting style. The signature date and time are added automatically.
- Choose the paper size (Letter or A4) and the report language: English, or Armenian with English below each term.
- Press Download report (PDF) or (HTML). Copy text copies a plain-text version for your records system.
The PDF also contains an empty digital-signature field, so it can be signed with a certificate in PDF software such as Adobe Acrobat.
12. Measure now, sign later
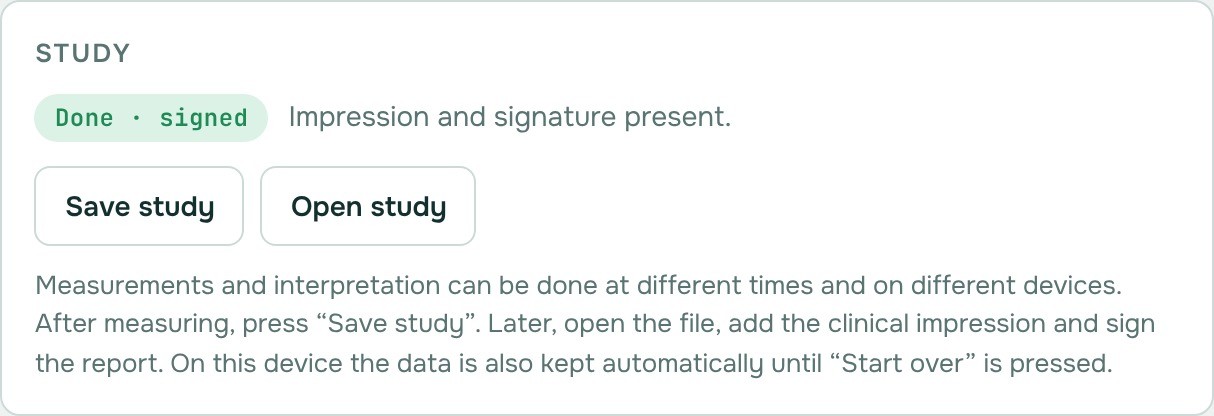
Measurements and interpretation can be done at different times and on different devices. After measuring, press Save study — a small file is saved to your computer. Later press Open study, choose the file, add your clinical impression and sign. The status label shows the stage: measurements only, interpreted, signed.
13. Next patient
Results stay in this browser until you press Start over (new patient). Download the report or save the study first — erased data cannot be recovered.
14. Settings
Repetition thresholds, default repetitions, grade limits and per-test reference values are set by the administrator in the program’s settings file. If your clinic uses its own norms, ask the administrator to enter them; the report then names the source of the norm.
15. Accuracy and limitations
- Angles are measured from a single 2D camera image. The typical error is 5–10°, larger for movements out of the camera plane.
- Rotations (neck, trunk, shoulder and hip rotation, forearm pronation/supination) are estimated and marked as lower reliability — confirm them with a goniometer or inclinometer when the result matters.
- The program measures active movement and supports clinical assessment; it does not make a diagnosis.
16. Privacy
The camera video is processed in your browser and is never uploaded. To calculate results, the program sends the server only the coordinates of body landmarks for each exercise — no images, no video. Patient names and reports stay on your device unless you save or send them yourself. The server stores your account and payment records only.
17. Troubleshooting
- No camera image: allow the camera in the browser (lock icon in the address bar) and close other programs that use the camera.
- “Body model: loading…” for a long time: check the internet connection and reload the page.
- Repetitions are not counted: make sure the whole body (or hand) is in the frame, the light is good and the patient faces the camera as described for the test. A slower movement helps.
- “No connection to the analysis server”: the recording is kept — press Send again, no need to repeat the exercise.
- No voice: press Test sound and choose another voice. Use Chrome or Edge.
- “Access to the program is closed”: your subscription has ended or you are signed out — open My account.